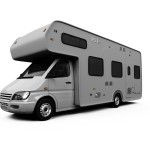
Dewinterizing Your Camper the Easy Way
 When the winter ends and you are ready to take a vacation, you might consider hooking up your camper and hitting the road. But you can’t just drive off with a camper behind you after the winter season without doing a little bit of work. Before getting started on your camping trip, you will need to dewinterize your camper. This means that all of your holding tanks must be flushed, your electrical systems and your generator will need to be tested, and the general well being of the camper must be checked. The process is not to hard to complete and only takes a couple hours to finish. Once you have completed the task at hand, you will be ready to embark on your trip with few problems.
The first thing that you should do when you dewinterize your camper is check the exterior. Start by checking the tires. Make sure that they are filled to the recommended pressure. If they are not, be sure to fill them up before leaving. The suspension should also be lubricated. Be sure to check the brakes and the wheel bearings. If any parts are needed, replace them. Once you have finished checking the camper for maintenance, wash it off using soap and water.
The next step is to clean out the holding tanks. They should be emptied out and then cleaned with bleach and hot water in order to keep them sanitized. The bleach and hot water should stay inside of the holding tank for a few minutes before emptying. The bleach should then be cleaned out of the tank by rinsing it with clean water. Use an air hose to blow out the lines that lead to the holding tanks. Follow this with another solution of bleach and hot water. Run clean water through the lines in order to remove the bleach. If the camper has a DC pump, run the bleach solution through it as well, followed once again by clean water. Finally, run clean water through everything a second time.
If the camper has a toilet, pour bleach and hot water into the toilet and let it sit for a few minutes. Clean the toilet and flush it a few times to clean it out.
Replace the propane tanks if they are empty or missing. Test the propane system to see if everything works. This includes checking the ignition values, the burner, and the propane lines. Be very careful when handling propane. Obey all safety warnings associated with the tanks, burners, and lines. If anything is in need of repair, replace the part. The water heater should also be checked. Check the plug on the bottom of the heater and any lines running away from the heater. Once again, if anything is in need of repair, replace the parts.
Air out the camper. Do this by opening up all of the windows and doors. Use disinfecting spray to clean out the interior of the camper. Pay special attention to the refrigerator. Clean it with a bleach solution in order to remove any unpleasant smells from the fridge. Let the camper air out completely before you stock it with any new supplies.
Check all of the electrical appliances in the camper. The fresh water tank needs to be filled with clean water for drinking. Start up the water pump and run all of the faucets until the water that runs through them is clear. Ensure that the hot water is in working order. Hook the camper up to the truck and make sure that the brakes work, as well as any of the electrical connections running from the truck to the camper.
Unless anything is in need of repair, you should be done within two hours. The process leaves your camper feeling like new and lets you enjoy your vacation to the fullest extent. Treat your camper with respect and it will last you a long time. Just make sure that everything stays in working order.
