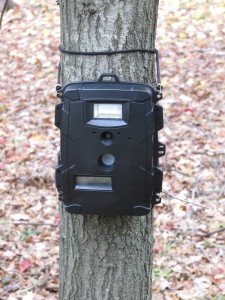
A Guide to Trail Cameras
Trail cameras are an excellent way to step up the game of hunting, or for just enjoying wildlife. They allow trail activity to be viewed around the clock, and are a helpful tool when scouting a new hunting location. These  convenient cameras are hung or mounted to trees and other natural formations. Trail cameras work by infrared sensors that when tripped trigger the camera to take a picture.
There are a number of choices on the market, but all trail cameras can be classified into two categories: digital or film. Digital trail cameras record pictures on a flash memory card, while film cams use rolls of film. In either case the flash card or roll of film must be removed from the trail camera when it is full and replaced with a new one. Film cams have the advantage of being a less expensive initial purchase, however with the cost of film and developing this type of camera can easily out cost digital cams in the long run. Another disadvantage to film cams is the wait involved to view the photos. For these reasons many hunters choose a digital trail camera.
When choosing a trail cam there are several features that must be decided on. One of the first things to decide on when choosing a camera is whether to purchase a still or video cam. Although video provides an excellent record of wildlife, these types of cameras are far more expensive to purchase and maintain. When choosing a still digital camera it is important to choose a model that features a high trigger speed. This will allow the camera to take pictures in quick succession to give a thorough idea of the game’s habits. Time laps is another factor to consider with a still cam. This is the intervals at which the camera will capture an image. The recommended time laps for a trail camera is between 1 and 60 minutes.
Another decision to make is in the resolution of the camera. This is measured in megapixels: the higher the number of megapixels the better the resolution. This is purely a personal choice. Some hunters want the clearest possible image, while others are content with a lower quality picture. One benefit of having a higher megapixel camera is that it allows the hunter to zoom in on a picture without it becoming too grainy or pixilated.
Infrared or color is yet another choice to make when purchasing a trail camera. Infrared are more expensive than color, however they have the advantage of not needing a flash that may scare deer or other wildlife. Color cameras have the advantage of producing more detailed pictures.
Once the camera is chosen it is time to choose a location for set up. The purpose of setting up a trail camera is to capture useful or desired images of game or other wildlife, so selecting an ideal location is important. A key point to remember in this process is to choose a position for the camera that offers a wide view of the trail. This allows for the most complete view of activity on the trail. Avoid positioning the camera to face east or west, as the sunrise or sunset will make visibility difficult, and may falsely trigger the sensor. To avoid camera issues caused by the sun point the camera north, and choose areas with heavy tree coverage.
Here are a few tips to keep in mind when using a trail camera. When retrieving the flash card from a digital trail camera, carry an empty flash card to replace the full card. Buy a locking device or purchase a camera with one installed to avoid theft. Make sure to clear any brush, sticks or twigs away from the camera to prevent tripping a sensor when the wind blows. Water holes and creeks or trees with deer scrapings are good places to capture activity.
